Customize Consent Preferences

We use cookies to help you navigate efficiently and perform certain functions. You will find detailed information about all cookies under each consent category below.

The cookies that are categorized as "Necessary" are stored on your browser as they are essential for enabling the basic functionalities of the site. ... 

Always Active

Necessary cookies are required to enable the basic features of this site, such as providing secure log-in or adjusting your consent preferences. These cookies do not store any personally identifiable data.

No cookies to display.

Functional cookies help perform certain functionalities like sharing the content of the website on social media platforms, collecting feedback, and other third-party features.

No cookies to display.

Analytical cookies are used to understand how visitors interact with the website. These cookies help provide information on metrics such as the number of visitors, bounce rate, traffic source, etc.

No cookies to display.

Performance cookies are used to understand and analyze the key performance indexes of the website which helps in delivering a better user experience for the visitors.

No cookies to display.

Advertisement cookies are used to provide visitors with customized advertisements based on the pages you visited previously and to analyze the effectiveness of the ad campaigns.

No cookies to display.

ルート化したNexus 7の 4.2アップデートに失敗したときの対処

Nexus 7にAndroid 4.2へのOTAアップデートが来ていたので、そのまま実行してみたら、失敗してしまいました。

仕方がないのでいつものXDAを探してみると、やはりそういうケースはたくさんあるらしく、対応策がありました。結局、以下のスレッドにあるツールを利用しました。

http://forum.xda-developers.com/showthread.php?t=1990814

上記スレッドにあがっているツールは、失敗から復帰させるツールではなく、むしろ失敗せずにアップデートするためのツールです。したがって最初からこれを使えばいいわけです。

ツールをダウンロードして展開してREADME.txtを読んでみます。あらかじめ PlaceMeOnYourSDCardSuperSu.zip というファイルを /sdcard の下に入れておきます。あとは runme.bat を実行すればよいようです。ROM焼きのためのイメージも最初から入っています。

runme.bat を見てみるとやっていることはこんな感じです。

1.bootloader を起動する
2.cacheを消して、bootloader.img を焼く
3.新しい bootloaderを起動する
4.boot.img, system.img, recovery.img を焼く
5.再起動してから、もう一度、リカバリーモードで再起動する
6.リカバリーモードから、あらかじめ入れておいた SuperSuを手動でインストールする

結果、無事に Android 4.2にアップデートすることができました。

最初、Dolphinブラウザーが動きませんでしたが、その後のアップデートで動くようになりました。

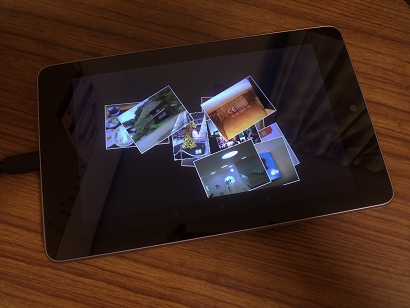
Android 4.2の新機能の中では、DayDreamというインタラクティブなスクリーンセーバーが面白いです。画面OFF時のスクリーンセーバーなのですが、設定で写真を表示するようにしておくと、画面にパラパラとランダムに写真が重なって表示されていくのですが、指で表示場所を動かしたりタップして拡大表示させたりできるのです。
PAGE TOP